Star News


How to paint a finished gel with a manicure varnish. How to apply gel polish at home correctly - step by step instructions
The hands of a real woman should look well-groomed, otherwise they are not hands, but the paws of Chuuya from Star Wars, and the owner of neglected nails from a mystery girl turns into a slut from a job that is used to washing with her hands, which does not cause any sexual interest.
Therefore, you should not be lazy and look for excuses for yourself, you need to learn to be beautiful and natural. For starters, you can at least paint on your nails. The manicure procedure takes about an hour, even with the use of gel polish at home, everything will take two hours.
Already two hours a week or two can be devoted to your nails, because they signal the whole world about the attitude of a woman to her beloved. And the world doesn't need to know that a girl walks around disheveled at home, cooks only in the presence of a man and often forgets to wash off her makeup before going to bed - in short, that she doesn't love herself very much ...
How to properly cover your nails with gel polish at home
What tools and accessories do we need?
Before starting the procedure, you should make sure that all tools and accessories for manicure are present or an equivalent replacement has been found for them. What materials are unambiguously needed and which ones can be neglected? To do a manicure, you need everything from this list (you can put the missing, and the excess can be postponed):


If all the manicure products are ready, you can start the application procedure itself. Below it is considered in stages. The sequence of application must not be disrupted.
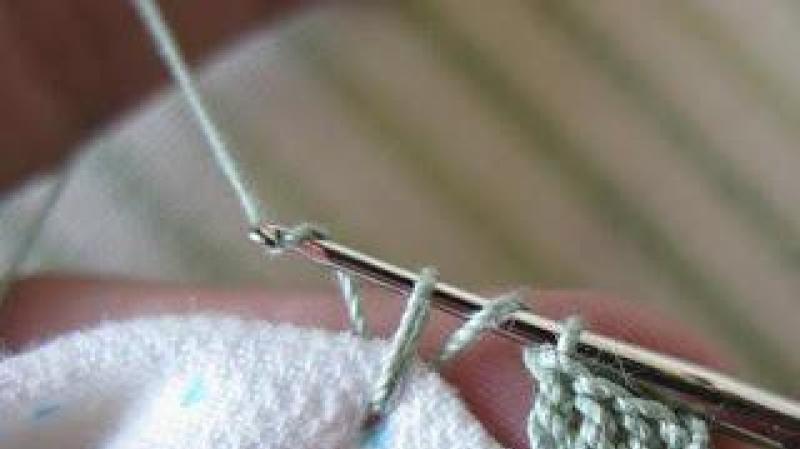
Procedure steps step by step

Preparation
Prepare your nails before applying gel polish or first. It is necessary to carefully clean them from the previous coating, cut off the cuticles at the edges, correct the free edge and be sure to disinfect the nail plate!

Disinfection is the prevention of fungal diseases under varnish, as it removes fat, excess moisture and bacteria from the nail. Also, the disinfectant simply cleans the nail of dust and dirt so that the shellac lays down better.
As disinfectants, you can use professional preparations that come in sets with gel polish, but ordinary alcohol is suitable for a manicure at home. Moreover, it is pure alcohol, not vodka, not perfume or lotion! It's just that there are too many in these funds additional components that prevent the varnish from adhering to the plates and can rub off. Plus, alcohol has a long period of activity and works even under shellac.
Before starting the procedure, you must once again make sure that the nail is cleaned from the previous varnish. To remove the cuticles, you must use a special tool or oil, but you cannot steam the nails, as they can delaminate.
In fact, when preparing as a basis, you should do the usual soft hygienic manicure, but do not immediately apply varnish. Moreover, you can not shorten the nail too much, shellac usually strengthens the nail plate, but everything must be sanded, otherwise the gel base will lie unevenly. Polish the nails with a buff, holding it along the nail plate. Removing the top keratin layer of the nail helps the shellac better adhere to the plate. You will have to remove it, although it seems that it does a lot of harm to the nail, but it is not. Then the nail is degreased and a primer is applied.
As a little trick, you can protect your hands from the harmful effects of shellac by applying regular sunscreen or baby cream. Otherwise, the action of ultraviolet radiation can dry it out ahead of time.
Base coat application
A transparent shellac base is needed for better adhesion of the product to the nail plate. The weaker the nails, the worse the varnish will adhere to them, therefore they are strengthened with a base layer. You can't save on shellac, even at home, since a bad base will ruin the whole manicure. The base shellac must be applied carefully and evenly on the nails with a thin layer and started to dry in a UV lamp, then repeat the painting again, and applied immediately after the base top.
Top coat application
The top shellac coating is also called the finish coat, since it secures the entire coating. It is done at the very end on fully prepared and processed nails. The brightness of the color and the accuracy of the nails depend on the correct coating.
Immediately after application, you should use a dryer, and after two minutes, you should evenly lubricate the area around the nails with hand or lip balm so that the skin does not dry out and crack.
If you follow the classic concepts of gel polish, then nothing is glued or applied to the top. Exceptions can be large elements, for example, rhinestones, but if possible, you should avoid this, since a manicure or pedicure will look untidy due to such sealing. This is one of the many secrets of manicure.
The final stage
After correct application of the top and drying in a UV lamp, blot the nails with a tissue with liquid to remove liquid. After that, hands are smeared with cuticle moisturizer and the shellac procedure is considered complete.
Differences between primer, bondex, and cleanser from each other
Shellac terminology is full of unfamiliar words, the meaning of which a novice manicure master can only guess. At least some of them should be considered. Below is a step-by-step comparison of the three key agents in shellac.
- Primer It is used to prepare the nail for adhesion, but it does not adhere anything itself, but only removes everything unnecessary on the plate. It can be compared to priming the walls under the wallpaper. It restores the pH of the nail plate, cleans everything so that the product lays down as correctly and firmly as possible. The degreasing primer does not require additional drying under an ultraviolet lamp.
- Bondex- a gel-like substance used to increase the adhesion between the nail plate and shellac. Thanks to this tool, the nails do not flake off, and the artificial material stays on the nail plate for as long as possible. Its action can be compared to double-sided tape, when it tightens both the nail and shellac. Bondex should not be applied to the skin and cuticles, if the drug gets on the fingers, they should be rinsed with running water. These two products (bondex and primer) are often confused.
- Klinser- water-alcohol solution with fragrances and oils. It removes the sticky layer at the very end of the gel nail polish at home, the fixer, although it can replace the primer if necessary, since it is a good antiseptic.
These three different manicure products are a must have for any woman who cares for her nails, rather than mindlessly trying to build them up. If possible, you should purchase them of the same brand, for example, Ingarden, Bluesky, so that there is no chemical incompatibility and deterioration of the adhesion. Proper care guarantees healthy nails and beautiful view shellac.
How to make drawings on nails with gel polish?
Nail art is a type of manicure, in which, in addition to the standard classical processing of nails, various patterns are also reproduced on them according to the method. Shellac quickly gives freedom to decor, so there are whole directions of nail design, when images are applied on an already finished coating. You can make absolutely unimaginable pictures on nails, it all depends on the master's imagination, but you need to understand that individual bright patterns will look more spectacular on long nails, and their use on short ones is unacceptable. Examples are shown below.
Techniques for drawing on nails.
There are a lot of techniques for painting with gel varnish professionally, but at home only a few of them can be used:
- painting technique with a thin brush;
- dots decoration technique (with a special tool with a small ball at the end);
- the technique of point manicure (somewhat reminiscent of children's drawing on points with the described sequence);
- “wet” technique: the varnish moves freely on the nail plate with a toothpick or needle;
- manicure technique with a liner.
Before starting to use any of the techniques, you should observe the master and his manicure sequence. If there is no way to go to the salon, necessary advice you can learn from videos on manicure lessons on the net. But to gain experience, you still need to work and work on yourself.
Rose gel polish: step by step instructions
Rose gel polish is one of the simplest drawings, so it can be reproduced even by beginners. The entire procedure from scratch can be broken down into several stages.
First you need to choose the right colors. Most often chosen White color for the background and red and green for the flower, but this is not required. You can play with colors and choose something unusual. For example, on a matte natural beige tone, a glossy rose is slightly visible. Or paint the nail with black varnish, and make the rose itself from rhinestones. It all depends on personal preferences and the range of clothing. A colored matte manicure with a large abundance of small roses looks very beautiful.
Then the nails are covered with the main color, and all at once, and not one by one, are dried in a UV lamp, this gives additional durability. The dryer allows you to seal the color for a long time.
When the varnish has dried, on the nail with the tip of a needle, you need to make several points with the flowers you like and connect them to the image of a rose.
Butterfly gel polish
The butterfly is a versatile design, as it is suitable for both short and long nails. It looks most effective on classic French manicure or just white nails, when the insect's wings contrast with the background.
You can paint a butterfly yourself using a liner or a brush, or you can just buy a sticker and attach it to your nail. It won't work with a rose. And this is an indisputable plus of the butterfly.
If, nevertheless, there is a desire to make the drawing myself, then it should be applied to a good ready-made base. First, the outline of the insect is drawn, and then the wings and body of the butterfly are filled with color. If desired, the drawing can be left as contour. But learning how to apply color inside the contour is simply necessary.
Shellac skull
Sometimes you want to step away from something cute and decorate your nails, for example, with a skull. At the same time, the application technology will differ little from the same butterfly, this is also light manicure, but the insides of the skull can be painted with shiny varnish or rhinestones. It looks impressive! But manicure ideas don't end there.
Hieroglyph shellac
The easiest way to draw hieroglyphs is that only two colors are used here. Usually black and white varnishes are chosen, but you can try a combination of black and red, blue and white, or yellow and green. But here the most important thing is not to miss the meaning of the symbol. Hieroglyphs are in vogue, but you shouldn't wear meaningless lines or descriptions of public toilets on your hands, this is one of the mistakes beginners make when designing nails.
Pirate theme
Gel polish can be used to coat your nails with Jack Sparrow's profile, the outlines of his Black Pearl and a pirate wheel. Of course, such a drawing will take a lot of time, but the result will be a stylish, unique drawing, and not a typical nail painting!
Shellac letters
You can also write your name on the manicure. Conveniently, if your name is Alexandra or Constance, you get one letter per finger. Others will have to come up with an arrangement of letters from the name and surname of relatives and children, but these are the subtleties of nail coverage. In general, gel polish at home gives a huge flight of imagination, if you remember the rules for applying! The main drawing mistakes: it is better to use the alphabet in which there are most letters in the name. Latin or Cyrillic are chosen according to their own preferences, otherwise then you will want to quickly wash everything off.
French gel polish: step by step photo guide
It is better to consider this technology of manicure and the next one using the example of drawings, where better training is given to coatings. Since they are no different from ordinary manicure at home, they are simply made using gel polish.
Ombre gel polish step by step at home
Method gradient manicure The ombre looks simple in the pictures, but you should not start it self-taught without practicing other options, for example, roses. Ombre manicure is characterized by a smooth transition from a bright and shiny to a matte pale shade of the same color, but only a professional can draw all the stages of coverage with high quality.
And some more facts about shellac.
- Shellac is a resin secreted by some insects in Asia. Then this resin is bought and used as a key component of the gel polish. None of the mechanical appliances make shellac.
- Gel polish promotes the growth of their own nails, if desired, they can be built up under such a shell.
- Thanks to a special coating technology, shellac protects the plates from scratches and traumatic damage.
This tool has a natural basis, and therefore is harmless to the body and has nothing to do with destructive extended nails. With shellac, permanent nail correction is not required.
About the magnificent appearance every girl dreams of marigolds. At the same time, I really want the resulting beauty to stay on the nails as long as possible. More recently, to get the perfect manicure, you had to turn to specialists in this matter. Everything is much easier today! Gel polish on nails is what you need, while it is easy to apply it yourself.


Are there any disadvantages to gel polish?
Of course, if we talk about chemicals, which are contained in any varnish, then we can say that there is a small amount of harm in it. However, there are much fewer of them in gel polish than in regular varnish.
Gel polish lasts a long time on nails, so you enjoy your manicure much longer (about two to three weeks) than with a manicure based on regular polish. It has to be renewed only if the nail plate has grown back enough.
Well, don't forget about the price. Gel polishes are expensive, but worth it!
Let's take a closer look at what every girl should be able to do to perform a gel polish-based manicure on her own at home?


Preparing marigolds
Before applying the gel polish, the nails should be cleaned and prepared. This process cannot be neglected, accuracy should be in everything. For this:
- Thoroughly clean the hands with soap and wipe them dry.
- Using a nail file, we give the nail plates the required shape.
- We remove the cuticle. It can be trimmed with tweezers or removed with cuticle softening cream.
Using a buff, it is necessary to polish the surface of each nail.


Do I need to file a nail?
It all depends on the brand of gel polish that you purchased.
Before applying, you need to file your nails if you bought a gel polish of brands that require it.
If gel varnishes do not require this, then the file is not required.
The nail plate is filed with a soft file intended for grinding.

Degrease the nail plates
This process is very important and if you skip it, then the gel polish will simply not stay on the nails for a long time.
At home, a professional degreaser can replace alcohol or acetone-based nail polish remover.
When degreasing the nail, you need to make sure that the procedure touches the entire nail plate, especially at the junction of the nail and skin.

Apply the base
The base coat is also necessary for the reliable fixation of the gel polish on the nail plates.
In shops and boutiques selling manicure accessories and varnishes, you can choose the necessary brand of base. It can be CND Base Coat brand or any other.

UV lamp
Before creating a gel manicure, purchase a UV lamp. Pay attention to its power. If it is less than 36 watts, then drying will take longer.
In any case, remember to dry the base coat for at least 25 seconds.
When using the lamp, remember to replace the lamp every six months.

Gel polish application procedure
After finishing with the base coat, apply the gel polish. Shake the bottle of varnish thoroughly before applying.
After the varnish is applied to the nail plates, we send them for polymerization in an ultraviolet lamp for two minutes.
The layer that you apply for the first time should be very thin, if you skip this moment and paint your nails with a thick layer of varnish, then after drying it will swell.
After that, we apply a second layer of varnish, a thicker one, and again send it under ultraviolet rays for two minutes.

We fix the manicure
In order for the manicure to hold for a long time, it must be fixed. For this, coatings of various firms and brands are used. There are a lot of firms producing fixers and you can pick it up absolutely any brand of your choice.

Removing the sticky layer
After applying the fixer, a sticky layer forms on the nail plate, which must be removed.
Remove it using napkins that do not leave lint on the nail. You can use alcohol, but in this case, the gel polish may lose its shine.
The manicure is ready! But how to remove it at home?

Remove gel polish from nails
Removing it is as easy as applying it. For this we need:
- Prepare cotton pads and pieces of foil to hold them in place.
- We moisten cotton pads with acetone or a nail polish remover based on it.
- We put the discs on the nail plates, trying not to touch the skin, and fix them with foil.
- Keep the discs for about 20 minutes. After that, everything is removed and the softened varnish is cleaned with a spatula to remove the cuticle.
- We treat nails with nourishing oil.
It's so easy to remove the nail polish!
Do your own manicure at home, experiment with colors, complement the manicure with decorative elements (beads, rhinestones, butterflies and flowers) and enjoy the beauty of your nails.

Video on the topic of the article:
More and more fashionistas stop visiting manicurists in salons. Make high quality and bright manicure at home is no longer a problem. To date, a huge number of tools, materials and tools have appeared that help to simplify the procedure for creating a manicure. Now you don't have to study for several months. It is enough to purchase the necessary stencils and stickers, as well as tools, and master simple technique applying gel polish at home.
The big disadvantage of home manicure was its fragility, but with the advent of gel polishes, manicure can be worn for more than two weeks. It should be noted that many girls call gel polish shellac, but this is a mistake. Shellac gel polish - manufactured by CND, is an expensive original product for professional manicure, which contains an organic polymer, respectively, the rest of the non-original products are not Shellac.
Gel polish combines the properties of 2 products for nail design - regular manicure varnish and modeling gel. Under the influence of UV waves, they polymerize, forming a dense film, i.e. there is a transition from a liquid to a solid state.
Instrument preparation

Popular articles:
In order to put your nails in order and do an interesting manicure at home, you need to prepare certain tools and materials. It is better, of course, not to choose the cheapest, otherwise a number of problems may arise and it will end up being more expensive. Everyone knows the saying “the miser pays twice”. It is recommended to carefully read the characteristics of the purchased tools and customer reviews. Next, we will tell you what tools you need for home manicure.
Ultraviolet lamp ( UV lamp) for drying nails. Now, mainly in beauty salons and at home, 36-watt lamps are used. They allow you to significantly speed up the drying process up to 1-2 minutes. Some have a built-in fan, but this is optional. The price range varies from 1100 rubles to 7000 rubles. There are also economical options of 9 watts up to 1000 r, but they dry one element much longer.

Which includes scissors, wire cutters, double-sided cuticle pusher, or orange sticks.

Polishing file - buff with a hardness of 900 grit. Such a file is used to polish the nail plate to improve the quality of adhesion to the gel polish.

more often chosen in the form of a boomerang . The gradation of hardness (graininess) is important here. For natural nails, files with a high abrasiveness, at least 500 and above, are preferable. For extended ones, they take more granular files from 100 grit to 180. 4-sided files are very convenient. They are used for both grinding and polishing.

You can buy inexpensive a milling machine for manicure with various attachments for nail treatment. Simple devices are suitable for the home, the price of which ranges from 1,700 rubles to 5,000 rubles. The power ranges from 18,000 to 25,000 revolutions per second. Professionals use devices with a capacity of 30,000 rpm / sec. The most popular brand is Strong.

Thin lint-free wipes necessary to remove excess material or sticky layer after drying.

Necessary materials

When all the basic tools have been purchased, you should proceed to the procurement of materials. It is also important to consider various brands of manufacturers and read consumer feedback on the quality of materials. Next, we will tell you what materials are needed for a home manicure.
A set of colored gel polishes and glitter, including white, black and nude... You can consider domestic manufacturers of manicure products RuNail or Aurelia, but there is already a persistent recommended list of inexpensive and high-quality gel varnishes. These include: Kodi Professional, Laque RuNail, Pnb (Professional Nail Boutique), Canni, Bluesky, Nogtika, and Red Carpet Manicure.

Scotch for creating geometric shapes and service jacket, stamps, stencils, sequins, rhinestones, etc. You will also need a set of brushes with natural bristles of various diameters for drawing and attaching rhinestones.

Degreaser or dehydrator Needed for pre-treatment of nails and to remove the sticky layer after drying.

Primer- means for treating the nail plate in order to eliminate natural fat deposits and dirt to improve adhesion. It softens the horny particles and the base coat adheres better. They are divided into acidic and non-acidic.

Base- a layer for aligning the nail plate. It is divided into ordinary, rubber (used for severe defects of the nail plate) and vitamin (for dry and brittle nails).

Used to soften and remove cuticles and dead skin cells.
Topcoat (top)- is applied as a final and fixing layer of manicure after the end of all manipulations.

Necessary for protection skin near the nail plate. It is applied after the completion of the manicure. Can be replaced with any other nourishing oils;
Special softening liquid for removing gel polish and foil also come in handy.

Step-by-step instructions for applying gel polish

When everything is purchased and prepared, you can start coating with gel polish at home. At first glance, it seems that this is a very time-consuming process, but after several procedures, you will already be quickly managed and hone your skills as an art designer. On average, the procedure takes from 15 minutes to an hour, depending on the complexity and condition of the nails. The procedure for applying gel polish can be roughly divided into 7 main steps.
Preparing nails
Step 1 - preparing the nail. In order to start creating a manicure, you need to prepare your nails. To do this, you need to steam your hands in a bath or use a remover in order to remove excess skin around the nail. Then, using a file, give the desired shape to the nail and sand with a buff, not forgetting to process the edges and base of the nail plate.

Pre-treatment of nails
Step 2 - surface preparation. A buff file is required for surface treatment. It mattifies the nail, eliminating gloss that interferes with adhesion to the coating layer. This process is very important, as if left out, the gel polish can crack and chip off after a few days. After the nail becomes dull, it must be wiped with a degreaser. It is necessary to ensure that after this procedure you do not touch the plates with your fingertips. Then, a primer is applied in a thin layer.

Step 3 - the process of applying the base coat. It is important to note here that after the primer has been applied, you cannot pause for more than 10-15 minutes between this layer and the application of the base. The base layer is applied in a thin layer, trying to avoid contact with the cuticle and other periungual tissue. Treat the end portions of the nail well so that they do not remain “naked”.
The base coat is applied to all fingers except the thumb and then dried. In a 36-watt lamp, about 2 minutes. After that, the thumb is separately treated and dried. After drying the nails, it is necessary to remove the sticky layer from them with a degreasing agent.

Colored coating
Step 4 - applying a colored coating. It is also recommended to apply the selected color gel polish with a thin layer. If something gets on the periungual zone, carefully remove it with an orange stick. Apply color gel polish in the same way as the base - first 4 fingers, except for the thumb, and then drying. The thumb is painted and dried for about five minutes. If the color is not evenly distributed or the layer is not of the same saturation as you would like, repeat the manipulations one more time.

Nail design
Step 5 - decorating your nails. Stamping, stickers on water based, rhinestones and freehand drawing are applied at this stage. The process takes a minimum amount of time, and any of the techniques does not require any special skill.

To use water-based stickers, cut out a pattern in the shape of a nail or a necessary element and soak in water as indicated in the instructions. Usually no more than 10 minutes. Then the drawing is wiped off and removed from the substrate, spreading over the nail.

To use stencils, they should be applied to the nails and smoothed. Then, each element of the stencil is drawn with colored gel polish with a brush and dried. Then we remove the stencil.

To use stamping, it is necessary without much pressure to transfer the desired pattern to the stamp by rolling it over the plate and cleaning it from unnecessary parts, and also, without strong pressure, transfer the pattern from the stamp to the nail.

To use scotch tape, it is necessary to stick it so as to separate certain areas for painting in other colors.

Finishing layer
Step 6 - applying a finishing or fixing layer. The top layer allows the manicure to last longer and also gives it a beautiful glossy shine. It is recommended to apply two finishing coats, painting over the inner side of the nail as well. Each layer is dried in a lamp for about 2 minutes. But, you can apply it once.

The final stage
Step 7 - removing the sticky layer. It is removed either with a degreaser or a dehydrator with a lint-free cloth. Excess gel polish, which protrudes on the sides, must also be removed with an orange stick or pillbox. After that, the cuticle is lubricated with oil.

As a result, depending on your preferences, you get a beautiful and neat manicure, for which you would have to pay dearly to a specialist in the salon.


Removing gel polish
 It's important to know . It will not work with ordinary acetone or nail polish remover. In order to remove gel polish you will need: foil, a special gel polish remover and cotton pads.
Cotton pads are divided into 4 parts, each is moistened with a gel polish remover, applied to nails and wrapped in foil for half an hour. Over time, the foil is removed and the remaining varnish is removed with an orange stick. If the coating does not come off well, it is necessary to manipulate it again.
Major mistakes

You need to know that when preparing nails, the most important things happen. mistakes, which affect the quality of the coating and the time of wearing the gel polish. They are as follows:
- An incompletely removed old coating prevents the new coating from lying flat;
- Bubble formation in the base layer due to poorly removed cuticle. Because of this, at the base, the new coating will crack and peel off;
- Improper buffing can make the nail plate smooth instead of a rough surface that helps adhere to the coating. Gel polish will not stick on a smooth surface;
- Gel polish will peel off or chip off if the nail plate is poorly degreased or the stage of applying the primer is skipped;
- Sometimes nails suffer from overdrying, due to the use of improperly selected treatment products before applying gel polish. On such nails, it will immediately crack;
- If the nail plate is thin and bends strongly, either length correction or preliminary strengthening of the nail is required, otherwise chips and cracks cannot be avoided;
- If you keep your fingers at an angle during drying, then polymerized nodules may appear;
- It is impossible to apply the coating with a layer that is too thick, it will not dry out, but instead there will be sagging and other defects;
- There may also be problems with the coating if the materials are of poor quality;
- If you do not seal each of the applied layers, then peeling is inevitable.
Reasons why gel polish does not hold

The procedure for applying gel polish for beginners seems daunting, but in fact, after trying several times through trial and error, the technique improves. Often, beginners ask questions about why gel polish does not hold well, it cracks and lags behind. To prevent this from happening, the masters recommend that you carefully and carefully follow all the steps for applying, not missing a single one.
Gel polish does not hold for a number of reasons:
- The old coating has not been completely removed;
- The cuticle is not completely removed;
- The nail is poorly skimmed;
- The stage of applying the primer is skipped;
- The nail is improperly sanded with a buff;
- The applied layer is too thick;
- Some of the layers are not sealed;
- Poor quality material, or mixed materials of different quality.
It is important to know that gel polish does not hold on weak and brittle nails. If you have fragile, brittle nails, you need to strengthen your nails before starting the procedure for applying gel polish at home.
Gel formulations have already practically supplanted standard varnishes from the arsenals of professional craftsmen. Moreover, ladies who appreciate home manicure are also gradually abandoning short-lived solutions and are gradually figuring out how to make gel polish at home. It's not difficult at all!
Gel polish tools
If earlier only ordinary low-resistance coatings were used in home manicure, now, perhaps, the range of accessories should be revised. High-quality work with gel polishes requires some specialized equipment, as well as tools.
Before starting to cover your nails with gel polish, you should make sure that you have such things at home as:
- ... The most important tool when using gel polishes in manicure. Required for the polymerization process, that is, for the hardening of the applied coating.
- Buff. With the help of a buff, a high-quality polishing of the nail plate is performed, which subsequently excludes nail delamination and guarantees the durability of the performed manicure.
- Degreasing agent. In the absence of a special composition, you can use a conventional nail polish remover, but in any case, you cannot do without this liquid. If you do not degrease your nails before the procedure for covering the nails with gel polish, then the manicure will be of poor quality and will quickly begin to lose its attractiveness.
- Base for gel polish. A necessary thing for reliable adhesion of the nail plate with the applied compounds.
- Top coverage. Ensures shine after finishing with gel polish.
- Liquid for removing the sticky layer.
- Primer.
- Gel polishes of different colors.
- Elements for decoration.
- Cotton pads, orange stick, cotton swabs.
Having all the accessories necessary for the high-quality execution of gel manicure, you can proceed directly to applying the composition.

Coating nails with gel varnish: stages
In order for a manicure performed with gel polish or shellac to be especially durable, it is worth scrupulously following all the recommendations for applying the coating. Attention will have to be paid to such actions as:
- Preparation of nails. At this stage, it is important not only to thoroughly make a hygienic manicure using hardware technology or any other, but also to take care of the quality of the nail plate. There should be no delamination, cracks, or irregularities on the nail. To do this, you will have to work thoroughly, achieving a matte color instead of the usual gloss on the surface of the nail.
- Degreasing. After the initial preparation, it is necessary to treat the nails with a special compound and remove all natural fats. After degreasing, do not touch the surface of the nails.
- Initial coatings. The sequence of application is as follows: bond-primer-base. Bond for surface drying; primer as a "primer"; base - the first preparatory layer of manicure. The base layer needs polymerization, so you should hold your nails under a UV lamp for 40-60 seconds.
- Coating nails with gel varnish. The simplest procedure of all. The selected color is applied to the nails, all blemishes are removed from the skin. Then polymerization is carried out under a UV lamp for 120 sec. If necessary, the procedure is repeated two to three times.
- Decorating. If you want to add a manicure, patterns or other decorations, you should do it right now.
- The last step is to apply the top. The top layer will give the manicure durability, but for this it is worth not only applying the coating to the surface, but also sealing the nail. Then carry out polymerization under the lamp for 120-180 seconds. The final point is the removal of the sticky layer with a degreasing compound.

It is simple and short-term to apply gel polish to your nails, but the result exceeds any expectations. That is why gel manicure is at the peak of popularity today - both among home and salon procedures.
In the beauty industry, the creation of gel polish has become one of the best developments of the new century. Introduced in 2010, the symbiosis of modeling gel and nail polish called gel polish revolutionized manicure. Today it is easy to buy gel polish of any color and firm. The product is easy to apply at home, so everything more women acquire necessary tools and home manicure products, and begin experimenting at home.
The initial stage in working with gel polish
Failure to comply with the technology for applying gel polish will lead to its flaking in the first few days after the procedure. One of the main points in manicure is the preparation of the nail plate for the application of gel polish.
- Shape your nail. Align the free edge of the nail plate and remove dust particles. A file for this procedure is needed with an abrasiveness of 180 grit.
- Treat the nail in the cuticle area. There should be no skin particles on the nail plate that interfere with the adhesion of nail cells to the varnish.
- Using a non-hard buff, remove the glossy layer of the nail, make it matte. Try not to overdo it in this procedure: nails become thinner, become brittle and sensitive. Therefore, do not press too hard on the file.
- Remove dust particles from your nails, use a sawdust brush.
Application of a starter layer
The base coat in gel polish is of prime importance. How long the manicure will last in perfect condition depends on its quality. Purchase a base from professionals in the gel polish market.
Use a primer before applying the base coat. In the case of gel polishes, the primer can be acid-free (it is more gentle). The primer is applied to the entire nail, including the end portion. Wait for the primer on the nails to dry completely (4-5 min.)
The base coat is responsible for the adhesion of the artificial material molecules and cells natural nail... Its functions include not only enhancing the strength of the nail, but also protecting the nail plate from coloring pigments of the colored coating.
Try to apply the base coat in a thin layer without touching the skin of the nail. After application, dry in UV lamp or LED lamp. The dried base layer will have a sticky texture. For a more even application of the next layer, you can evenly distribute the dispersion layer over the nail using a dry brush.
Coating the nail with colored gel polish
When applying gel polish, you can show all the riot of imagination. The range of colors and textures of gel polishes is huge and constantly expanding. More and more striking and daring novelties appear on the market. Among the most popular today are MASURA products, which delight with new collections.
Before applying color gel polish, the bottle must be shaken so that the color is applied evenly. You need to apply gel polish with a thin layer. For an even, saturated color, cover the nail with 2-3 layers of gel polish. Pay attention to the end of the nail, paint it carefully (as if "sealing" the nail). Dry each layer in the lamp in accordance with the time limits indicated in its instructions and on the packaging of the varnish manufacturer.
The final stage in working with gel polish
The final coat of gel polish is necessary to give the manicure shine and color fastness. The finish gel can be applied in a thicker layer than the previous ones. But it also requires more thorough drying. With a poor-quality finish, poorly cured in a UV lamp or LED lamp, the manicure will not look perfect.
The sticky dispersion layer is removed from the nail with a clinser (special solution).
If you fulfill all the requirements in working with gel polishes, you can become the owner of a luxurious long-lasting manicure. It should be borne in mind that each manufacturer of gel polishes determines its own polymerization time, so follow the instructions for use.