Star News


Step-by-step video and photo tutorials on gel nail extension. How to make gel nail extension step by step
Unfortunately, nature has not endowed all women with strong and durable nails. This issue is easily solved, one has only to visit a beauty salon and use the nail extension service. This process can be done with your own hands. We will consider two types of gel build-up: on tips and forms. And also we will briefly talk about the types of French-style extensions with visual photos. And, if you have no desire to visit salons, then our article will tell you about gel nail extension step by step.
What to choose: forms or tips?
Extension of nails can be carried out using forms or tips. When there is a nail base on the finger, it is necessary to use nail tips. In order not to be mistaken in the right choice, you need to take into account the width of the nail surface, what kind of bend you want to get at the end of the work and do not forget about the height of the nail hole. When we talk about using forms for building gel, we mean recreating from scratch the lengths, shapes that you or your client prefer, not forgetting to take into account the structure of the nails and the size of the fingertips. When the type of work has been chosen that suits your client, you need to know that there are five types of nail structure:
- slightly convex;
- snub;
- flat;
- cat's marigold;
- wavy.
The most common are feline marigold and snub-nosed nail growth.

"Cat's marigold"
Extension of a cat's marigold must be carried out not on tips, since with the growth of the nail, its free edge will bend down. This will create a space between the tip and your nail, hence dust and water can enter. In this case, you need to use a nail extension form.

"Snub-nosed" nails
If you work with snub-nosed nails and decide to build on forms, do not be surprised that in the future the nails will lose their correct structure. And in this case, it is better to use tips.
The final result of gel build-up also depends on the type chosen, one of which is used most often - this is a three-phase gel build-up:
- Base gel
- Construction gel
- Finishing - coating with gel polish

Extension of nails at home
To make your work at home smooth and complete, you need to stock up on these tools, they can be purchased at ruNail:
- UV lamp;
- antiseptic;
- modeling agent - adhesive;
- the foundation;
- degreasing agent - dehydrator;
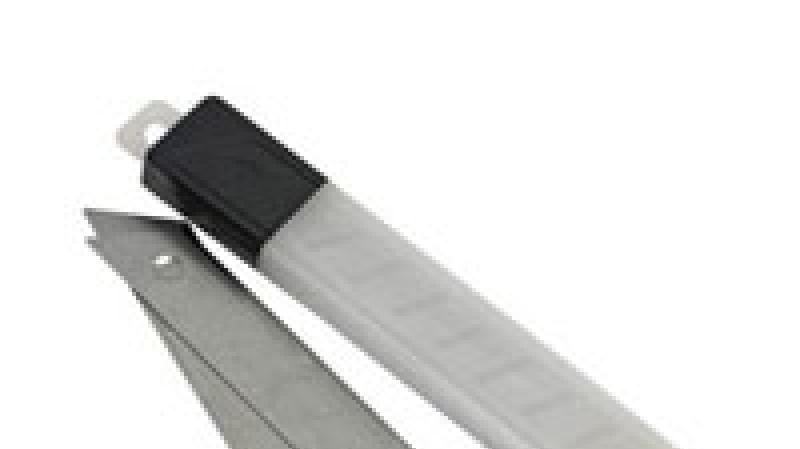
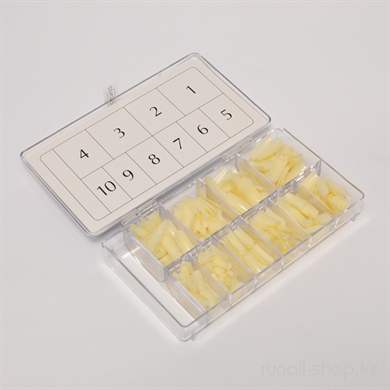
- tips;
- forms;
- sculptor;
- clinser;
- flat brush;
- file 220/280 grit;
- file 240 grit;
- finishing gel;
- glue for tips;
- lint-free napkins;
- orange sticks;
- dust brush
- cuticle oil.

Step-by-step instructions for beginners
Gel nail extension on tips:
- Prepare the nail surface with an orange stick: peel off the cuticle, create the desired shape for the free edge, and polish the nail area with a 220/280 grit rectangular file, it prepares the nails for polishing, smoothes and removes scratches.
- Apply a degreasing agent
- Apply a thin layer of nail tip glue to the free edge of the nail and the contact point of the tips. It is necessary to attach the tips to the nail at an angle of 45 degrees, and lower it so that the line of the tip of the tips and the edge of the nail are aligned.
- Further, without detaching, gently lower the tips on the nail and spread the glue in the same amount over the entire area with smearing movements.
- Again we put the tips at an angle of 45 degrees, bring them to the line of the foot and after the heard crackling, gently lower the tips onto the nail. It must be held for about 10 seconds.
- We shape the tips at the request of the client, taking into account the structure of the nail.
- We get rid of dust particles and degrease.
- We cover with a modeling agent on the area of the nail.
- With a slightly damp brush, apply the base gel along the entire length of the future nail and place your finger under the lamp for 1 minute.
- Using a flat brush, apply the sculptor, taking into account the structure of the nail. We leave it under the lamp for three minutes.
- Using a lint-free napkin, remove the sticky layer with a clinser.
- With the help of a buff, we palette the area of the nail.
- Degrease and cover with a finishing gel. Again we put our fingers under the lamp for three minutes.

Below we offer you video tutorials on building:
How to build up nails with gel on forms
- We treat our hands with an antiseptic.
- We clean the surface of the nail with a 220 grit file.
- We cover with a degreaser.
- Next, cover with a base and place your hands under the lamp for two minutes.
- We clean up the top layer.
- We fix the form.
- Using a brush, apply the gel, while turning your finger downward with your fingernail, so that the gel is evenly distributed.
- Again we put our hands under the lamp for three minutes.
- Cover with gel again and form an “S” curve.
- After the lamp, clean the sticky layer.
- Getting rid of the form.
- We level the surface with a buff.
- Brush off the dust and cover with a finishing gel.
- Again we put our hands in the lamp to dry for two minutes. Degrease the surface of the nails and coat the cuticles with oil.
Below we propose to consider step-by-step build-up in photos and videos:


Ageless jacket
Under each type of jacket, you can see finished work in pictures, as well as video on design:
- French millennium

Gel nail extension at home is very relevant for modern women of fashion. Every woman wants to look attractive and well-groomed. A beautiful manicure helps to emphasize the image. Therefore, many women and girls are interested in how to build nails, because an exquisite and neat manicure is evidence that a woman knows how to take care of herself. And the application of this substance allows you to make nail plate smooth and glossy.
How to extend nails with gel?
There are two methods to grow gel nails. In one of them, tips are used, and the other method involves application to special plates. Gel nail extension technology using tips involves the use of artificial nail plates, which can have various shapes, sizes and shades. They are attached with glue, then covered with a product. This method allows you to build up gel nails on your own without much difficulty. This technology is more popular. Such gel build-up is suitable even for owners short manicure... This method allows you to get an exquisite and beautiful manicure women whom nature has deprived of a strong and healthy nail plate.
 Gel nail extension using forms involves the use of a variety of stencils. They are produced in metal, paper and plastic. The process of nail extension is quite simple. It consists of placing a stencil on top of a plate and then applying a gel. After the coating has hardened, the mold is removed. It is possible to build up your nails with this method only if they are long enough.
Gel nail extension can be omitted if the plate itself has beautiful shape and sizes. In this case, it is sufficient to cover it with several layers of the substance to prevent breakage and delamination.
Back to the table of contents
Gel build-up process
When creating this manicure, the masters use a gel system for nail extension. At the first stage, the hands are prepared. They should be thoroughly disinfected and the cuticles carefully removed. Then the nail plate is polished for a stronger adhesion to the coating. The top fat layer is removed from it and a special agent is applied to remove moisture residues.
Read also: How to dry gel nail polish without a lamp
The next step consists of applying a coating to the nail plate. It is advisable to avoid touching the gel and skin... When forming a gel coat, it is recommended to leave a small gap between it and the skin. After applying the first layer, it is necessary to dry it under a special lamp with ultraviolet rays. This procedure helps to avoid fungal infection. After drying, a second layer is applied. Gel build-up should be done with great care, because it is very easy to damage the uncured coating. To give the nail plate hardness and strength, it is necessary to apply the gel in several layers.
 If during the drying procedure with an ultraviolet lamp there is a feeling of discomfort, this may indicate poor quality materials or a too thick coating layer. In this case, it is necessary to stop the gel nail extension.
After applying all the layers, you need to shape the nail plate. You can decide on its length. This coating does not need to be polished. it has its own luster. The final stage will be the design. You can varnish your nails, make a painting, decorate with a special decor.
The basis of gel nail extension technology is the use of a special material that can harden under the influence of ultraviolet rays. The gel evens out the surface of the nails, giving them a glossy shine, does not cause irritation of the cuticle and skin around the nail. False nails made with gel have a natural shine, they are transparent, and their structure is similar to a natural nail.
Types of gel for nail extension
- A three-phase system consists of three components, separated by their functionality. The first layer is responsible for the safety of contact of the nail plate with the artificial material, provides the best adhesion (adhesion). The second one simulates the body of the nail. The third layer provides strength, protecting the nail from external influences, and also creates a shiny and smooth surface.
- Two-phase system: one component is used for adhesion and modeling, the other is responsible for the strength of the nail.
- In a single-phase system, gel is a versatile material, like acrylic, it has all the necessary properties, providing adhesion, modeling, and strength.
Gel nail extension methods
- - artificial nails that differ in shape, color and size. They are glued to the nail plates and covered with extension gel. In this case, the tips are part of the resulting nail. This method is suitable for almost everyone, it can be used even with short own nails.
- (lower or upper) - with this method, special plates are attached to the nail, on which the gel is applied. After building, the forms are easily removed from the nails. The main advantage is the great naturalness of the manicure, and it is much easier to remove such gel nails.
Sequence of gel nail extension
- The first stage is the preparation of the nail (hand disinfection, cuticle removal by an uncut method). For better adhesion of the gel to the nail plate, the surface of the nail is polished by removing the upper fatty film. A special primer is then applied to the nails to remove excess liquid.
- Next, the gel is applied to the nail with a brush, while the contact of the gel with the skin must not be allowed, it is imperative to leave half a millimeter from the gel to the skin. After that, the gel is dried under the rays ultraviolet lamp within a couple of minutes (the gel heats up, so it is important to keep track of how long your hands are under the lamp). The gel hardens under the influence of ultraviolet radiation, while treatment with a UV lamp will prevent the development of fungal diseases on the nails.
At this stage, special care is required, if inaccurate, the uncured gel can be damaged. After drying, apply the next layer of gel and dry again. Usually this procedure is repeated a couple of times to give the nail sufficient hardness and strength. Important: if a burning sensation appears during drying, perhaps the master has applied a too thick layer of gel or a poor quality gel is used. In this case, drying must be stopped until all unpleasant symptoms stop. - After the last layer of gel has hardened, the master gives the nail the required shape and length using a file. Gel nails do not need polishing, thanks to the special properties of the gel, they already shine beautifully.
- The last stage is this. Coating with colored varnish and decoration with various decorative elements is carried out.
The total duration of the gel nail extension procedure is about three hours, as a result you get strong and elastic nails.
Gel nails are not only beautiful, but also durable - they can last up to 4 months.
After building up in the first month, you will need to make a correction twice, then it will be enough to perform it once a month.
In order for you to have no problems with gel nails in the future, it is important to adhere to a few simple recommendations (and, regardless of whether you are building nails at home or in the salon):
- On the day you are going to grow your nails, do not use hand cream. This can lead to the formation of a cavity between the gel and the nail.
- Clean your cuticles thoroughly before extending your nails.
- You should not combine the procedure with a period of taking antibiotics or hormonal drugs.
- It is not recommended to build up on critical days, as well as the day before they start.
- Nails should be healthy, extensions should not be done for various nail diseases, this can aggravate existing problems.
- Do not forget that under the protection of the gel, your own nails can weaken. Therefore, if you have grown nails, it is advisable to take calcium and vitamins during this time to strengthen your natural nails.
Long nails can be a dream come true for some girls. After all, not everyone manages to grow the nail plate to the desired length. Then modern technologies come to the rescue.
They can be of any length, various designs are possible, for example, decoration with rhinestones, broths, application of patterns.
Gel nails look natural and beautiful, the result lasts 2-3 weeks, then they gradually grow back together with the nail plate, so correction is needed.
On the Russian market, you can buy products from all world manufacturers. Gels are presented both single-phase and two-phase, three-phase.
You should be wary of the nameless or unknown products of Chinese manufacturers, which are usually not of good quality. There are exceptions, though.
For building under varnish, transparent gels and with a natural shade are used. Colored French manicure products are also sold.
The extension procedure is quite simple, so even novice masters gain experience quickly.  Someone copes with it even on their own at home without taking courses. After all the tools and materials are prepared, you can proceed.
To build up with gel, special materials are required:
- The first thing you need to purchase is the forms... They can be disposable paper and reusable Teflon. Teflon molds have a wire frame and standard sizes and can be reused. You can also find on the market transparent forms that better transmit ultraviolet rays. When buying material from an unknown manufacturer, try a few pieces first to make sure of the quality of the adhesive surface, because the form must firmly adhere to the nail during operation.
- Manicure wipes- are used as an alternative to cotton pads. Lint-free material easily removes the remains of varnish, is used for various manicure works.
- Brushes are indispensable... They need several, narrow and wide. In the process of work, the desired size is selected based on the width of the nail bed. When buying brushes in the store, pay special attention to the rigidity of the pile and the reliability of the attachment of the hairs to the base.
- Acid-free primer- obligatory when working with gel. If the plate is oily or damp, an acidic primer is needed. It is recommended to use gel and primer from the same manufacturer.
- For a three-phase system - base and top.
- Directly gel- each master chooses a manufacturer empirically. Over time, there is an understanding of which material is more convenient to work with.
- You will also need a lamp to dry the material. impossible without an ultraviolet lamp. They differ in terms of power and configuration. The more powerful the lamp, the faster the gel hardens. The lamps used in salons have a power of 36 W - this is the best indicator for home appliances.
- Nail files and blocks- it is better to buy a set with files of different degrees of hardness right away. The free edge is filed with abrasive tools, the natural shine is removed with polishing blocks. The degree of abrasiveness is called grit and is indicated on each instrument. The higher the number, the softer the file.
- Orange sticks- a convenient disposable cuticle pulling tool.
- Sticky layer remover - cleanser- required after gel polymerization.
- Additionally worth purchasing antiseptic for hands, brush cleaner, cuticle oil.
 What does the process of building up on forms with gel look like?
 Step-by-step instructions for gel nail extension on forms:
- First step . We treat our hands with an antiseptic and proceed to the processing of marigolds. To do this, cut off the excess length, it is necessary to remove the cuticle (or move) and the pterygium. Now we go through the buff on the nails, removing the shine, remove the dust with a sweep and degrease the plates.
- Second phase . Apply an acid-free primer. There are primers that air dry in a minute and lamp dry in two minutes. Slightly bent shape - we substitute the stencil to the marigold, fix the ears above the finger and below the nail. The shape should be a direct continuation of the plate and hold without gaps.
- Third step. We take the modeling gel of the first layer, in addition to covering the nail, they lay out the base - they give the shape to the future marigold. This layer needs UV drying. After the lamp, carefully remove the base. (Some extension systems use a special base - it is thinly applied to the nail and sent to dry in a lamp for two minutes. In this system, the forms are not removed from the nails - the nail will be lined up with the modeling gel in shape.)
- Stage four. For example, consider a monochromatic build-up. We spread the gel with a brush - start from the center, going down in a zigzag movement, pull the gel slightly towards the cuticle, nullify the skin and along the side ridges. Work through the stress zone and dry your nails for a couple of minutes.
- Fifth stage. We start filing and shaping the marigolds. We remove dust with a broom, wipe it with a napkin in a cleanser. Now you can apply the top coat and carry out the final drying - three minutes.
The extended french remains quite popular, when the edge of the marigold is decorated with white or colored gel, and the base remains in a natural color.
French manicure looks stylish, appropriate both in everyday life and at a holiday, and is less noticeable when the nail grows back.
Before deciding on gel nail extension on forms, it is worth making sure that the contraindications to the procedure do not apply to you.
Gel materials should be avoided for those taking antibiotics and suffering from allergic reactions.
When working with household chemicals, you should use protective gloves. If the nail is damaged, it is necessary to make a correction as soon as possible in order to exclude the hall.
In general, a correction is required every two to three weeks so that the nails look neat and beautiful.
VIDEO ON TOPIC
In order to return the attractive appearance, as well as restore the shape, resort to the correction procedure. 
It consists in removing detachments and filing the top layer by sawing off with a nail file, and applying a new layer.
- The master begins work by treating hands with an antiseptic,
- Then removes the varnish.
- Most of the time is spent cutting off the old gel layer. Here, the professionalism and accuracy of the master is important, who should not damage the skin and natural coating in order to avoid the appearance of air bubbles under the new layer.
- After removing the remains of the gel, a fresh layer is applied, a bend is formed and the overgrown part of the marigold is covered, polymerized under a lamp and filed to give the desired shape. Finish the process with a top finish or coated design.
If the nails are irregular or not long enough, you can build them up with modern procedure gel build-up... It is convenient, fast and beautiful. To do this, use different ways building up.
The choice of gel for nail extension is of great importance for the final result and convenience of work.
Gel jelly for nail extension (where to buy, features)
Its structure is an airy mousse. It adheres perfectly to the brush and does not drip. The gel perfectly lengthens the natural nail plate and hides all defects.
The shades are mainly flesh, beige and pale pink. Gel jelly white use for a jacket.
Features of jelly gel:
- does not change color when dried;
- does not require careful cutting after hardening.
It takes experience to apply the gel-jelly evenly
Since it is difficult to sculpt compared to UV gel, it does not align well.
To date, the gel is presented in a sufficient range in online stores. It will not be difficult to buy it. The main thing is to look at the reviews when choosing a manufacturer in order to avoid buying a low-quality product.
Cosmo gel for nail extension (where to buy, features)
Cosmo is a Polish-made camouflage gel.
- Has a thick jelly-like texture, which greatly facilitates application.
- Unlike jelly gel, Cosmo perfectly self-leveling, while forming an even surface.
- Easy to cut.
- No chips or cracks appear when worn.
- 60 seconds are enough for complete polymerization.
- A wide range of shades are available both in retail stores and online.
Gel for nail extension Kodi (where to buy, features)

Has its advantages.
- Reduces and simplifies the process. The light texture and high degree of self-leveling make it possible for both professionals and inexperienced specialists to cope with it.
- Three-phase gels are used to model nails of various lengths and shapes. The drying process takes only a few minutes.
- Able to maintain a long-lasting color and shine for three weeks.
Note! While some have noted a runny texture, this is not a major obstacle.
The brand is distributed all over the world and ranks first among the manufacturers of gel formulations. Any master can purchase Cody products at any store that sells manicure products.
What you need for gel nail extension: a list
Only the right equipment will provide quality coverage.

Tools used in the process of nail modeling:
- UV lamp. Without it, gel polish will not set. For the best setting and drying speed, choose a 36 watt lamp. Professional models are even more powerful. Instead of a rare design model with additional functions choose a simple model with a timer.
- For best application gel, use high-quality brushes, artificial or natural pile of which does not fluff and holds well. You may need an oval, square, or fine-tipped brush. When choosing a brush, they pay attention to the consistency of the gel: with a liquid one choose a narrow one, with a thick one - a wide one.
- Files of different roughness levels. The most popular are fine-grain files - 180 * 240 grit. They are different forms: straight or curved. Additionally, they purchase a buff - a file in the form of a volumetric rectangle.
- Pusher or some special orange tree sticks to push back the cuticle.
- Regular nail scissors to trim nails, burrs, or nippers to help you get the job done better.
- Cutter - nippers for tips.
- A brush designed to sweep away dust after processing with files and buffs.

Necessary materials:
- Extension of a natural nail plate is carried out using tips or forms. Tips can be different thickness... Initially, they should be tested for elasticity, they should bend easily without forming streaks. Choose a material with a wide glue area - it will stick more firmly. Molds are made of plastic or paper. Plastic ones are used repeatedly, paper ones are disposable.
- The glue with which the tips will be glued.
- Lint-free nail wipes. Available in roll form.
- An extension and masking gel, which is called camouflage: single-phase, two-phase or three-phase.
- Primer. An adhesive composition that improves the strength of the connection of materials with the nail. It is acidic and acid-free.
- The foundation.
- Finish - will help to achieve shine and smooth nails.
- Liquid to help remove the sticky layer. Can be replaced with ordinary alcohol.
- A cuticle moisturizer.
- Acrylic-based paints, colored gels, rhinestones, glitters and the like are useful for creating nail designs.
It is necessary to choose high-quality materials for gel nail extension, especially at home
Read the reviews before buying. If the materials are of poor quality, the manicure will be short-lived, and its creation will be laborious.
Starter kit for gel nail extension, where to buy
First of all, the contents of the set depend on the price. Manufacturing brands are often put up for sale starter kits... Sometimes they are formed in the warehouses of online stores and sold as an exclusive offer.

You can create a set yourself, but it is advisable to purchase ready-made sets, this will greatly facilitate the work. In addition, the materials and tools in these kits are often intended for non-professionals.
The starter set of nail modeling tools includes:
- UV lamp.
- Multiple brushes for comfortable gel application.
- Gels of 6 varieties: basic (for modeling), transparent, pink, camouflage, white, top.
- Antiseptic for hands and nails.
- Primer.
- Dehydrator
- Forms, sometimes come complete with tips.
- A special product to remove the sticky layer.
- Files of different grain size.
- Grinder.
- Lint-free napkins
Some starter kits come with instructions. Before buying, it does not hurt to carefully study the package contents.
Gel nail extension - step by step instructions with photo
Some beginners are wondering if building is done with gel polish and where to find a step-by-step guide. So, gel polish is a decorative coating, they do not build up, they use a special gel for this.

As you could already understand, either tips or forms are used as the basis for the gel. Let us consider in detail how the building process is carried out in both cases. First, you need to choose a place with good lighting, while halogen lighting is not suitable, otherwise the gel will quickly harden.
Extension of nails with gel on forms (step by step instructions)
Step-by-step instruction:
- First, the hands of the manicurist and the client are disinfected: they use an antiseptic or just wash their hands with soap and water.
- Treat the nails as usual, tidying them up if necessary. Although it is advisable to do this in advance a day or two.
- Removing the top coat from the nail will help the base coat adhere more tightly to the surface. After that, be sure to remove the resulting dust.
The form is fixed. Be sure to make sure that the form is fixed evenly, without gaps.

- Degrease the surface and apply a primer. Dry it up.
- Then the first thin layer of gel is applied. This is followed by drying under ultraviolet light (at least 3 minutes). Remove the top layer after drying.
Apply the gel to the middle part of the nail with a brush. The hand is placed under the lamp for another three minutes. - When the layer is dry, the liquid removes the sticky layer. The template should also be carefully removed.
- The topcoat should be applied after thoroughly sanding the nail, slightly outside the applied gel.
- Then it is dried again under ultraviolet light for a few minutes. At the end, the nail is degreased.
Gel nail extension on tips (step-by-step guide)
Process sequence:
- Hands are disinfected. It is important that the surface of the nail is dry.
- The cuticle should be pushed back with a spatula or stick.
- Then you need to give the nails the same shape as the tips and sand the surface.
- Dust is removed with a lint-free cloth.
- The size of the tips used should be selected for each nail separately.
- A little glue is put into the hole of the tips (if the nail is wavy, use gel glue) and it is strongly pressed for 11 seconds. Remains of glue should be removed.
- The pliers are given the desired length, and the contour is formed with a file.
- The nail is treated with a buff and a primer is applied. Once the liquid has dried, the surface should be covered with a gel. Drying takes 4 minutes.
- Then the gel layer is reapplied and dried. A special liquid removes stickiness.
- The finish is applied after degreasing the surface. The hand is placed under ultraviolet light for another 4 minutes.
- At the end, the cuticle is lubricated with oil.
Covering nails with gel without extension

First, you should treat the cuticles and nails with an antiseptic.
- The nail surface is polished with a grinder or a file of medium hardness and the nail plate is shaped.
- Then a primer should be applied to improve the adhesion of the materials. One minute is enough for it to dry.
- Now the nail is covered with a base thin layer of gel, as long as it is not too close to the cuticle. The hand is placed under ultraviolet rays until the gel is completely dry (2 min.)
- After that it is necessary to apply a modeling gel layer. It is dried in a lamp - 3–7 minutes.
- It is necessary to carefully process the nail plate with gentle grinding. and remove dust from it with a napkin.
- A finishing coat is applied to the nail. If the topcoat is sticky, degrease and polish it. With a non-sticky coating, these operations are not necessary.
Gel nail extension technology: French - beautiful and stylish
French is created using two technologies: laid-out and hand-drawn. In the first case, the tip of the nail is made with white (or another color) gel, in the second, it is drawn with gel paint or varnish on the finished nail.
Layout technique:
- Initially, a standard antiseptic treatment is carried out. Then the cuticle is pulled back, the nail is sanded and degreased, a dehydrator and primer are applied.
- The shape is fixed on the finger.
- Then, starting from the tip, apply the base.
- Then the plate is formed.
- Then the coating is dried under a lamp for several minutes. Apply a pale pink or beige gel to the beginning of the white tip.

- Irregularities or defects are hidden with a repeated layer of gel.
- After drying, the stickiness is removed with a napkin and the mold is removed.
- Next, the nail is filed and the smile zone is polished with a buff.
- A white gel is laid out, then the hand is placed under ultraviolet light for four minutes.
- The surface is polished and the shape is corrected. At the end, the jacket is covered with a finishing gel and dried again. The final touch is to remove the sticky layer and soften the cuticle.
It's important to know! If it is necessary to give the effect of a glossy shimmer, then a pearlescent gel is used.
Single-phase gel for nail extension: how to use (technology)
The application technology is as follows:
- Initially, hands must be treated with an antiseptic.
- The cuticle moves back.
- With files of varying degrees of roughness, the nail is polished and filed so that it matches the size of the tips.
- Tips are glued. To create the required length, a tip cutter is used, for the form - a nail file.
- After that, the seam of the tips is carefully processed, and the nail is filed to remove the shine.
- Then a primer is applied. When it evaporates, a single phase gel is laid out.
- The nail is dried under UV rays.
If irregularities appear, the sticky layer is removed, the nail is filed, and the gel is applied again
- At the end, the nail is filed with a soft nail file, and the cuticle is moistened. The gel nails are now ready to decorate them.
Gel nail extension at home: step-by-step instructions for beginners

Self-building is carried out as follows:
- The nail surface is cleaned and the cuticle is cut.
- A file for sanding removes the shine from the nails, then the surface is leveled.
- The nail is degreased.
- For beginners, the method of building on tips is suitable. They should be glued onto prepared nails. After the glue dries, the required length is formed. The file smoothes the nail surface and creates the preferred shape. After degreasing, a gel layer is applied.
- The hand is placed under ultraviolet light for a few minutes.
- Then another gel layer follows, and again under the lamp for five minutes.
- With the help of the liquid, the sticky layer is removed, the gel is applied, and the nails are dried under a UV lamp for at least ten minutes.
- After complete polymerization, the shape is corrected and the sealant is applied.
- Note! When using a new brush, remove the factory glue from it.
- To do this, the index finger of one hand is wrapped in a paper napkin, brushes are taken in the other hand and lightly tapped on the napkin with it for a minute.
Gel nail extension: photo with various designs
There are a lot of options for building and decorating nails. Let's consider the most popular ones.
3D modeling
This is a tricky nail design method as it takes a lot of work. Gel for 3D modeling holds its shape surprisingly well, does not crack or spread.

Of course, the process of performing 3D modeling is very painstaking. Each layer is not complete without painting or accessories in the form of acrylic flowers, curls, ornaments that are formed with a brush.
Art painting
Today it is the most commonly used technology for decorating nails. This design uses gel varnishes, watercolors, acrylic paints.

Drawings are applied with a needle, thin brush or a sponge. To create a geometric pattern, use adhesive-backed strips. The most commonly used designs include Zhostovo painting, Chinese, Gzhel.
Stamping manicure
To apply the pattern to the nails, specially created stencil plates are used. This is perhaps the most easy way creating a complex and interesting design... Stamping manicure looks bright, catchy, spectacular.

Often, stamping is used to model a wedding manicure in the form of lace. Konad is the leader among manufacturers.
Combined design
A nail art professional can skillfully combine a variety of designs at the same time.

The result is very beautiful options manicure.
How much does gel nail extension cost in the salon
On average, the price for extended gel nails in the salon varies from 1200 to 6000 rubles. In some salons this price does not include, for example, design. It is paid separately and depends on the complexity. If the price in the salon is less than 1000 rubles, then, most likely, the client will receive a low-quality and unstable manicure, since in this case cheap and low-quality materials are used.
Gel nail extension: video tutorials for beginners
Educational video gel nail extension from scratch. Video instruction for beginners
How to build nails: instructions for dummies. Watch a helpful video: