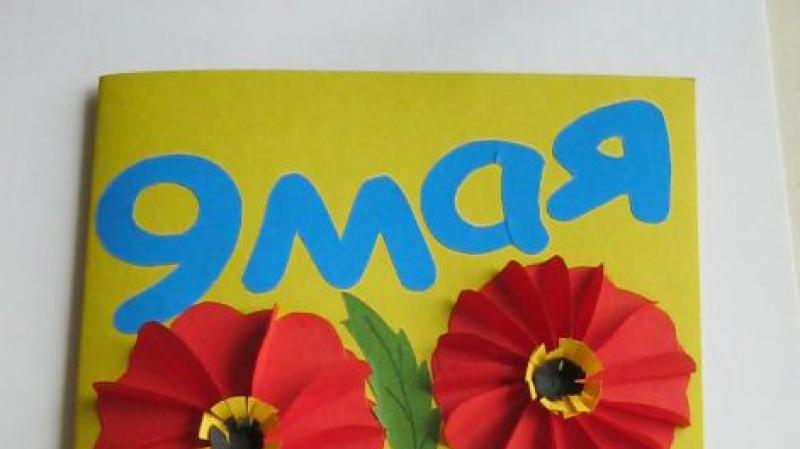
Star News


How to properly cover your nails with gel polish at home. How to paint your nails with gel polish at home
Gel polish is a combination of gel and varnish that, when exposed to UV rays from a specialized lamp, gives the nails special strength. Despite the fact that today almost all nail masters provide services for covering nails with this tool, sometimes it is still difficult for girls to find time to go to the salon, and you want to be well-groomed and unique in any life situation... Therefore, in order for you to always "be in trend" - we will teach you how to apply gel polish step by step at home.
Benefits of gel polish

What do you need to have on hand?
Before doing a long-lasting manicure, you need to figure out what you need to have with you to create it. So, the correct application of gel polish is impossible without the following elements that we need at various stages:
- UV lamp with a power of at least 36w;
- Hand sanitizer;
- Fine nail file (preferably for natural nails);
- Coarse-grained buff;
- Orange cuticle stick;
- Lint-free wipes;
- Degreaser (dehydrator) - means for cleansing and "matting" nail plate;
- Primer - this tool provides the best adhesion of the gel to the nail plate;
- The base is a base transparent gel (strengthens and protects the nail from the penetration of the coloring pigment of the color gel into it);
- Color gel polish;
- Finish gel or top - consolidation of the result.
Stages of applying gel polish
Dropped all doubts, prepared the necessary "arsenal" and get to work! It should be noted that before you start applying the gel polish, you need to do a manicure for an ideal result.
- The first mandatory step is hand disinfection. Before starting any "work" with nails, you should wash your hands or treat them with a disinfectant solution.
- Carefully, using an orange stick, push the cuticle as far as possible - this will open the nail plate as much as possible.
- If necessary, file the nail lightly with a nail file to give it the desired shape.
- Next, "matte" the surface of the nails with a buff. It is important not to overdo it here, otherwise the plate will become washed down and damaged.
- With the help of a degreaser and a lint-free napkin, we remove dust residues and at the same time "dry" the nail. You do not need to make sudden movements so as not to "stain" the prepared surface.
- We apply a primer - an important element on which the durability of a long-term manicure depends, among other things. It is important to distribute it over the entire nail plate and not forget the butt end.
- Base coat - the base is applied in a thin layer and is responsible for the strength of the marigold. We take a little transparent gel polish and distribute it in a circular motion from the edge of the nail plate to the cuticle. Important: do not flood the cuticle and do not overload either the base of the nail plate or the edge of the nail.
- Then dry in a lamp for 1 minute. After drying, the marigold has a sticky layer, so you can make adjustments and trim the result. But it is not necessary to remove the sticky layer at this stage, it serves as a "cement" for the colored gel polish.
- We take the main color. If you want to get the "effect" natural nail, then you can apply a light coating of any nude shades in one layer. If you need a bright and denser manicure - in 2 or 3 layers. The main thing here is not to "thicken" the nail plate, the layers should be thin. Do not forget about the butt end of the marigold - we paint over it too for a high-quality result. After each layer, dry in a lamp for 2 minutes.
- At the final stage, we apply a top coat. It is created to consolidate the result and add extra shine to the nails. You can not regret the top, but also do not forget about the cuticle - it should be free of varnish. Dry in a lamp for at least 30 seconds and remove the sticky layer with a degreaser.
We have painted the gel polish coating technology in stages so that you can immediately achieve the desired result. But remember! You can not skip any of the steps above and break the sequence! Then the result will meet your expectations, and the spectacular manicure will be persistent and neat! Share in the comments what secrets of applying gel polish do you know?
About the magnificent appearance every girl dreams of marigolds. At the same time, I really want the resulting beauty to stay on the nails as long as possible. More recently, to get the perfect manicure, you had to turn to specialists in this matter. Everything is much easier today! Gel polish on nails is what you need, while it is easy to apply it yourself.


Are there any disadvantages to gel polish?
Of course, if we talk about chemicals, which are contained in any varnish, then we can say that there is a small amount of harm in it. However, there are much fewer of them in gel polish than in regular varnish.
Gel polish lasts a long time on nails, so you enjoy your manicure much longer (about two to three weeks) than with a manicure based on regular polish. It has to be renewed only if the nail plate has grown back enough.
Well, don't forget about the price. Gel polishes are expensive, but worth it!
Let's take a closer look at what every girl should be able to do to perform a gel polish-based manicure on her own at home?


Preparing marigolds
Before applying the gel polish, the nails should be cleaned and prepared. This process cannot be neglected, accuracy should be in everything. For this:
- Thoroughly clean the hands with soap and wipe them dry.
- Using a nail file, we give the nail plates the required shape.
- We remove the cuticle. It can be trimmed with tweezers or removed with cuticle softening cream.
Using a buff, it is necessary to polish the surface of each nail.


Do I need to file a nail?
It all depends on the brand of gel polish that you purchased.
Before applying, you need to file your nails if you bought a gel polish of brands that require it.
If gel varnishes do not require this, then the file is not required.
The filing of the nail plate is carried out using a soft nail file intended for grinding.

Degrease the nail plates
This process is very important and if you skip it, then the gel polish will simply not stay on the nails for a long time.
At home, a professional degreaser can replace alcohol or acetone-based nail polish remover.
When degreasing the nail, you need to make sure that the procedure touches the entire nail plate, especially at the junction of the nail and skin.

Apply the base
The base coat is also necessary for the reliable fixation of the gel polish on the nail plates.
In shops and boutiques selling manicure accessories and varnishes, you can choose the necessary brand of base. It can be CND Base Coat brand or any other.

UV lamp
Before creating a gel manicure, purchase an ultraviolet lamp. Pay attention to its power. If it is less than 36 watts, then drying will take longer.
In any case, remember to dry the base coat for at least 25 seconds.
When using the lamp, remember to replace the lamp every six months.

Gel polish application procedure
After finishing with the base coat, apply the gel polish. Shake the bottle of varnish thoroughly before applying.
After the varnish is applied to the nail plates, we send them for polymerization in ultraviolet lamp for two minutes.
The layer that you apply for the first time should be very thin, if you skip this moment and paint your nails with a thick layer of varnish, then after drying it will swell.
After that, we apply a second layer of varnish, a thicker one, and again send it under ultraviolet rays for two minutes.

We fix the manicure
In order for the manicure to hold for a long time, it must be fixed. For this, coatings of various firms and brands are used. There are a lot of companies that produce fixers and you can choose absolutely any brand of it at your discretion.

Removing the sticky layer
After applying the fixer, a sticky layer forms on the nail plate, which must be removed.
Remove it using napkins that do not leave lint on the nail. You can use alcohol, but in this case, the gel polish may lose its shine.
The manicure is ready! But how to remove it at home?

Remove gel polish from nails
Removing it is as easy as applying it. For this we need:
- Prepare cotton pads and pieces of foil to hold them in place.
- We moisten cotton pads with acetone or a nail polish remover based on it.
- We put the discs on the nail plates, trying not to hurt skin, and fix them with foil.
- Keep the discs for about 20 minutes. After that, everything is removed and the softened varnish is cleaned with a spatula to remove the cuticle.
- We treat nails with nourishing oil.
It's so easy to remove the nail polish!
Do your own manicure at home, experiment with colors, complement the manicure with decorative elements (beads, rhinestones, butterflies and flowers) and enjoy the beauty of your nails.

Video on the topic of the article:
Almost all masters provide nail polish services today. In this article, we will consider technology for working with gel polishes, the use of which will help the master to complete the design in the highest quality way.
Without any doubt, gel polishes are one of the best achievements of the nail industry for last years... A hybrid of gel and varnish is very popular among both craftsmen and clients. Coating nails with gel polish on this moment is one of the most fashionable and demanded nail services. Main advantages gel polish technology: Convenience and simplicity of the process of applying to the nail; high speed of polymerization in the lamp; color fastness; the intense gloss of the coating remains until the removal procedure; safety of use for the nail plate, hypoallergenic materials.
Subject to the correct gel polish application technologies lasts up to 20 days on nails. At the same time, the coating does not lose its shine, does not crack or chip off, does not require additional correction. The nails look absolutely natural and with all this the natural plate is protected. However, sometimes even these latest high-tech advances let us down. Instead of the declared 2-3 weeks of wearing, the coating begins to crack or peel off in the very first days after application. Consider the errors in technologies applying gel varnishes.

Preparing the nail plate for coating with gel polish
Step 1. Formation of the free edge of the nail. The free edge of the nail plate should be perfectly flat and absolutely free of dust.
In case of delamination of the nail plate, carefully trim it with a file for natural nails (240/240, 180/180). If necessary, at the request of the client, a manicure can be done. But, if you used oils or creams during the procedure, you must thoroughly clean your nails after the procedure with cleansing liquids and dry for at least 10 minutes. To avoid detachment of the gel polish coating, you need to push back the eponychium and remove the cuticle from the nail plate.
Step 2. Removal of the upper keratin layer of the nail plate.
We use a buff with high abrasiveness. We remove only the gloss from the nail plate. If this is not done, the gel polish will chip off. We do not touch the treated nails with our fingers. For the final removal of residual moisture and filing, we use a special agent with a fat-free pH-formula Bond (dehydrator). This allows for a strong adhesion of the gel polish to the nail plate.
Step 3. Base gel application.
In the event that the nail plate after the removal of the extended nails is very soft and weak, the gel polish may begin to chip off already in the first days after the application procedure. To prevent this from happening, a primer can be applied to the weakened plate. This is necessary for a tight adhesion of the base gel to the natural nail. Modern acid-free primers do not contain methacrylic acid - application is safe for natural nails. They are a primer. In order not to get it, it is necessary to treat the end of the nail with a primer.

Base gel, gel polish and finish technology
Base gel application is one of the main components. The base gel serves as a base for the gel polish. It is responsible for creating a molecular bond between the natural keratin of the natural nail and the artificial gel material. At the same time, the base gel protects the nail from the penetration of the coloring pigments of the gel polish.
V technologies for applying gel varnishes it is important to ensure that the materials are applied to the nail plate in a very thin layer. This also applies to the base gel. Take a small amount of base gel on the brush and apply it with rubbing movements, starting from the free edge. We also cover the butt of the nail. After that, we go through the entire nail plate in long movements from top to bottom. Make sure that the gel does not come into contact with the skin and side rollers. Next, place the nail in a UV lamp for 1 minute to cure the base gel (in an LED lamp for 10 seconds). After the base has dried, smooth out the dispersion layer with a dry brush. This is done so that the color gel polish lays down evenly, does not collect and does not spread to the side rollers.

When using color gel polishes, you need to know some of the nuances.
- All layers must be applied very thinly. If you do not comply gel polish application technology, then we may have the following problems: waves and jags on the free edge; air bubbles over the entire surface of the nail.
- Using bright, pastel colors, apply 2 coats of gel polish. In this case, each of the layers must be polymerized in a UV lamp for 2 minutes (in an LED lamp for 30 seconds).
- When working with dark colors, the first layer may be colored unevenly. There is nothing wrong with that. You do not need to apply a large amount of gel polish. This problem will be fixed with a second layer. When working with dark tones, it is better to make 3 thin, but even layers, than 2 dense ones, which will go in waves.
- Do not forget to cover the end of the nail, pay attention to the uniformity and smoothness of the coating.
The final stage is covering with a finishing gel - Top Coat. The finish gel is applied with a slightly thicker layer than the colored one. Again, don't forget about the ends of the nail. The finishing gel must dry well. Insufficient polymerization of the gel will result in a loss of shine when the sticky layer is removed. We dry it in a UV lamp for 2 minutes, in an LED lamp for 30 seconds. We remove the dispersion layer with a special Cleanser - this gives the coating a beautiful glossy shine. Cleanser contains moisturizing ingredients that protect the nail plate and skin from drying out.

Removable gel polish in 15 - 25 minutes. Gel polish is removed by soaking in a special tool in the same way as acrylic nails... The longer the gel polish has been on the nails, the longer it will soak. The presence of a primer further increases the process removing gel polish... After soaking, the gel polish rises in the form of a film and can be easily removed from the nail plate using an orange stick.
Compliance technologies for working with gel polishes allows you to avoid most of the problems, it is equally important to use quality certified materials.
Technology for applying gel polish on video
This video shows the application and removal of gel polish using the example of Gelish. Other brands of gel polish are applied in a similar manner.
Another video on technologies for applying gel polish(used by Gellini)
Modern varnishes look beautiful, but, unfortunately, they last no more than 2-3 days. They were replaced by shellac, which allows the manicure to look perfect for 2-3 weeks. And making a gel polish at home, as it turns out, is not at all difficult.
For a high-quality shellac-coated manicure, the following materials and tools are required:
A step-by-step guide to applying gel polish at home
First of all, you need to get your hands in order. First you need to take warm water into a container, add a teaspoon of lemon juice and sea salt, a few drops of shower gel or shampoo. Hold your hands in this solution for 15 minutes, then wash them well with a brush and wipe them off with a towel.
Then you need to make a bath, which includes any oil (heated in a water bath), 5 drops of lemon juice and a few drops of vitamin E. Nails are immersed in this oil solution for 10 minutes. At the end of the procedure, you need to dry your hands thoroughly with a paper towel and start removing the cuticle.
After the oil bath, you need to wait a few minutes in order to better see the dead skin. Since the cuticle has softened, it is easy to push it back with an orange stick. Next, using nail scissors or tweezers, they remove the cuticle and excess skin around the nail plate.
Preparing the nail plate
In order for the manicure to hold well, it is required to properly prepare the nail plate. Wipe your nails with rubbing alcohol and then buff thoroughly with a buff. It is necessary to carefully remove the keratin layer, without leaving untreated, even small areas. The more carefully this operation is carried out, the longer the manicure itself lasts. 
Buff processing is carried out along the nail plate. When all the nails are prepared, you should lubricate the skin around with baby or sunscreen so that the ultraviolet light does not dry it out during drying in a UV lamp.
Base application
The main task of the base is to help the colored coating better adhere to the nail. Therefore, you should not save on it, because the quality of the coating and the durability of the manicure depend on it. The base is applied in a thin layer and then dried in a UV lamp.
Applying color gel polish
Now you can start applying the gel polish of the desired color. The varnish is applied in several layers, usually two or three. It is necessary that each layer is very thin. The thinner the shellac layers, the better it will subsequently hold. If the gel leaves marks on the skin when applied, then it is removed with an orange stick. 
After the first coat, the fingers are placed under the lacquer curing lamp.
Then the next layer is applied and again the hands are placed under the lamp. If the color is not saturated enough, the procedure can be repeated again. After the color coating has completely dried, proceed to the last stage - applying the top.
Top application
The top is often called a top coat, as it is the final one in creating a manicure. Its main task is to consolidate the coatings that were applied before. How bright the color will be and how neat the manicure will be depends on the correct choice of the finish. The top is applied in an even, thin layer not only over the coloring layer, but also under the nail, sealing it. 
The coating is dried under a lamp for a couple of minutes. Then you should repeat this procedure again. At the end of all stages, the nails are wiped with a cleanser or alcohol. It remains to rub in the cuticle oil and admire the manicure. As it turned out, it is quite possible to make a gel polish at home and you should not be afraid of it.
What does gel polish consist of?
Gel polish is something in between gel and varnish. It is durable and beautiful. It has a polymer structure. Remove the coating by softening.
Gel polish consists of a photoinitiator, film former, thinner, pigments and other decorative fillers.
The photoinitiator reacts to ultraviolet light. Thanks to him, the varnish is structured and hardened. The speed of hardening and drying time depend on its amount. The film former creates a barrier that prevents the coating from collapsing.
Thinners help the varnish adhere to the nail plate. Their quantity determines not only the durability of the varnish, but also how easy it will be to remove. Pigments give the shellak a certain color and density. The gel can be mixed in a wide variety of shades and colors. Best of all, if varnishes from the same manufacturer are mixed, then you do not have to fear for the quality of the future manicure.
Fillers are very diverse. They give the coating a special sophistication and originality.
How to choose a UV lamp for home use?
When choosing a UV lamp, first of all, you need to decide what it is for and what funds you can afford to spend on its purchase. 
Lamps are divided:
- Fit: You can hold one or two hands.
- By type: LED or fluorescent.
- According to the ignition scheme.
- By power: the more powerful the lamp, the shorter the curing (drying) time of the coating.
For home use, a lamp with a power of 9 W to 54 W is quite enough. The power of the lamp depends on the number of 9 W bulbs that are in it. So in the 36 W lamp there are 4 of them, in the 54 W lamp there are 9 of them. And you need to dry your nails after applying each layer. If the lamp is 36 W, then the drying time of the base is 30 seconds, the color coating and the top is 2 minutes.
At a lamp power below, the polymerization period is increased, more powerful - it is reduced.
Why is it necessary to apply a base coat?
The base coat is the basis of any silk manicure.
Its main functions are:
- protection of the nail plate;
- alignment;
- adhesion of the subsequent color layer to the nail;
- strengthening the nail plate;
- treatment.
Without a base, even with the most expensive shellac, a manicure will not be perfectly smooth and will not last long. The base is the first and main component of a reliable manicure, so you shouldn't neglect it.
Why apply a top coat?
The final step in the silk coating is the top coat. 
Its main purpose is:
- alignment;
- drying;
- preservation of blooming varnish;
- strengthening.
Recently, coatings have appeared that also perform decorative functions. There are top coatings that allow the manicure to glow under the influence of ultraviolet radiation, make the nails glossy or matte. Gives a sandy texture.
It should be remembered that in order to make a gel polish at home, you need to think about how the manicure will look if you apply a coating with "special" actions.
Smooth application tricks
Considering that gel polishes have a sticky structure, it is not always possible to apply them smoothly.
Experts share some tricks for even application of shellac:

Primer, bondex, clinser: differences
There are a lot of words in the terminology of gel polish that are difficult for a beginner to understand.
A primer is a tool that prepares the nail for connection, but does not itself participate in this process. It degreases the nail plate and restores pH. The primer does not need to be dried under a UV lamp.
Bondex is a gel that is used to connect the nail with shellac. Prevents the nail plate from flaking and allows the coating that is applied to it to hold firmly.
Klinser is an alcohol solution that contains some oils. It is used to remove the last sticky layer from the surface when the manicure is completely finished. Sometimes it can be used instead of a primer, as it disinfects well and is a good antiseptic.
Features of applying gel polish on extended nails
It is possible to apply gel polish on extended nails. However, it should be borne in mind that when applying shellak, the nails become thick, so the layers should be as thin as possible so that your nails do not look rough and bulky. In general, the painting procedure does not differ from the classical application of shellac.
 A step-by-step guide will help you understand the question: how to make gel polish at home.
 First, the nail is polished with a special nail file, degreased and a base is applied. After polymerizing and applying a colored coating. Again under the lamp and a second color layer. Polymerization, top, lamp.
As you can see, it is quite possible to make gel polish on extended nails at home. The problem arises when it needs to be removed. Since shellac is the same gel, it is impossible to remove it from extended nails. This must be considered before deciding to apply it on acrylic or gel nails.
Simple home design
How to make gel polish at home in stages has already been discussed. But not everyone will want to limit themselves to just a single-color coating. Having several bottles of multi-colored silk, you can begin to master the skill of applying a pattern or multi-colored coating.
It is not only beautiful, but also quite possible to do it yourself. This requires 2-3 brushes and a desire to experiment. Consider a few simple options for nail design at home.
Drawing with gel polish: rose
The rose is one of the simplest designs. Even a person without much experience can draw it. First of all, you need to choose the background color on which the drawing will be applied. A red or deep pink flower looks good on a white, beige background. A white or sand rose looks original on a black matte background. 
The flower can be either one for the entire nail, or several small ones. Now it is fashionable when the drawing is applied to two nails of one hand. This is how the manicure looks unobtrusive and neat. After the background is selected, applied and dried under a UV lamp, you can start applying the pattern itself. Rose petals are applied from the center to the edges with small strokes, similar to commas.
Then they are smoothly connected. If there are flaws in some place, they wipe it with a lint-free napkin and paint again. When the rose is painted, the nails need to be placed under the drying lamp. If desired, the petals are shaded with a more or less intense shade and again dried under a lamp. You can add leaves or curls.
Experts recommend drying the gel polish after painting part of the drawing with one color, unless of course there is a desire to mix shades or make a smooth transition. After the drawing is ready, it is covered with a top and dried.
Drawing with gel polish: butterfly
The butterfly pattern on the nails gives the manicure a special tenderness. In order to clearly imagine how the future drawing will look like, you need to draw it on paper. Think over the nuances and color options. Clearly define your artistic ability. 
Having begun to work, the outline of the wings of a butterfly is drawn on the selected background. Fill them with the selected color. Draw streaks. Each time, after the drawing is drawn in one color, the marigolds are dried under a UV lamp. The butterfly looks unusual, its wings are on two adjacent fingers. The color of the wings can be either monochromatic or with a transition from one to another. It all depends only on imagination.
Drawing with gel polish: hieroglyph
Hieroglyphs look very interesting on nails. Drawing a hieroglyph does not provide anything complicated. After passing through all the stages of the main manicure, apply the image on the nail with a thin brush with strokes. You should not draw meaningless lines, it is better to choose a hieroglyph, the meaning of which is known.
French gel polish
French is still in fashion and is appropriate for both business woman and for a young girl. Drawing a "smile" is not particularly difficult. It takes a little practice and there will be no problems. For the first case, you can use special strips, later one brush will be enough. 
After the main color has dried, draw a smile line with a brush. Then they paint over it intensively. Defects or irregularities are corrected with a stick or toothpick. After drying and covering with a top, the manicure is ready.
In addition to the classic French manicure, you can apply bright combinations of varnishes, an inverted "smile", decoration with rhinestones and sparkles. As it becomes clear, making a French gel polish at home is very simple.
Ombre gel polish
The ombre manicure looks original. The smooth transition from one color to another makes the manicure very attractive. The color palette ranges from very bright and catchy to gentle and businesslike. But the technique of applying such a coating is not easy and differs in some subtleties.
After applying and drying the base, two strips of silk of the selected colors are applied to a small piece of foil. Then the boundaries of the gel are mixed with a toothpick. The skin around the nail is smeared with a greasy cream. After that, the nylon sponge is dipped into the shellac prepared in this way and applied to the nail. The varnish that has got on the skin is removed and only after that it is dried under a lamp.
The combination of an ombre with a jacket, the so-called moon manicure when the white tone smoothly turns into a beige or pink haze.
Imitation of water manicure
Do water manicure gel polish in the full sense of the word is impossible, as it sinks in water. But you can achieve an imitation of this effect by applying a special varnish application. 
To do this, after the base, parallel lines are applied to the nail plate. different colors... Then, a thin brush is drawn across the lines, mixing colors and creating different patterns. It should be noted that in this case drying under a UV lamp takes a little longer than usual.
As you can see, making your own gel polish at home is not only possible, but also very interesting. There are a lot of design options, and every two weeks you can admire a new neat and well-groomed manicure.
Video on how to make gel polish at home
Applying gel polish step by step:
Tips and rules for the perfect home gel polish:
To give the marigolds aesthetic beauty, it is not at all necessary to visit the master. Since it has become much easier to make gel polish today, you will master the technique even at home. We will outline the main points step by step and highlight what materials and tools you need. Let's start!
How to make gel polish - we select tools and materials
Before you do quality manicure with gel polish, you need to make sure that all the accessories are at home. What is needed for this?
Ultraviolet lamp
Of course, you can dry the coating without a lamp, but you will waste time and energy. In order to accelerate the polymerization of the composition, purchase a UF or LED lamp. Choose a unit with a capacity of at least 36 watts. The cost varies from 1,500 to 3,000 rubles. It all depends on the manufacturer. For home use, the simplest lamp is suitable.
Nail Tongs / Scissors
Immediately before applying the coating, it is necessary to cut off the cuticle so that the manicure turns out to be neat. Purchase stainless steel tongs or scissors from a professional store. The choice depends on what tool you are used to working with. The cost of scissors is 150 rubles, tweezers - 400 rubles.
Files, pushers, buffs
Since it is possible to make a high-quality gel polish only if preliminary preparation of the nails is carried out, at home it is necessary to take care of the availability of appropriate tools. Before applying the coating step by step, you will need to push back the cuticle with a pusher (orange stick), shape the nails (with ordinary files), polish the surface (buff).
Degreaser
A degreaser, otherwise called a dehydrator, is required for pretreating the nail plates. Thanks to this simple step, the gel polish will not flake off after 2-3 days. Also, a degreaser is needed to remove the sticky layer when the manicure is already 95% done. Do not rely on the advice of "experienced" who say that you can remove the sticky layer with alcohol or acetone.
Primer
Since it can be quite difficult to make a manicure with gel polish at home, do not complicate your life. Follow the recommendations, buy a primer and everything else you need for this. The primer costs about 200 rubles for a 20 ml bottle. It is necessary for better adhesion of a natural plate with an artificial turf.
Base, top
It will not be superfluous to mention that concepts such as "gel polish" and "shellac" are one and the same composition. Shellac is just a well-known company that produces coatings of this kind. Before making a gel polish, make sure you have a base (base coat) and a top (top coat) at home. The step-by-step procedure is carried out simply with the presence of tubes with these two formulations.
Color gel polish
The main thing here is color, quality is assigned to minor role... Choose a shade based on your personal preference. It is not necessary to consider eminent firms (such as Shellac), analogs will do. Better make sure that the base with the top is of good quality. To summarize - you can save a little on color.
Aids
Once the manicure is complete, you will need to soften the cuticle with targeted oil. You can use any herbal, but it is better to buy a product for treating the skin around the nails. Decorative elements (sequins, rhinestones, sequins, stickers, etc.) also belong to auxiliary means. If the design is tricky, purchase nail art decorations.
Manicure with gel polish in stages: 6 steps
Now we will look at how to do beautiful manicure with gel polish. At home, you will need all the materials and tools. We have already figured out what is needed for this.

STEP # 1
Stretch your hands in a salt bath, push back the cuticle with a pusher. Use tweezers or scissors to trim off excess skin around the nail. Arm yourself with a nail file, give the plates the desired shape of the free edge (square, oval, circle).
STEP # 2
Before making a gel polish, you need to take a buff and use it to remove the gloss from the nail plate. At home, this procedure must be carried out without fail. When the nails become dull, first degrease them in stages, then apply a primer over the entire surface of the plates and the free edge. The primer will seal the ends.
Important! After degreasing, the primer is applied, then the base coat. Between applying the primer and the base, you can not take a break longer than 15 minutes. Otherwise, you need to make another 1 coat of primer.
STEP # 3
We apply the base. Roll the bottle gently between your palms, but do not shake to avoid bubbles. Spread the product in a thin layer, taking care not to skip the loose edges of your nails. Do not let it flow onto the cuticles and periungual ridges, otherwise remove the excess with an orange stick.
Important! In the process of distributing the base, follow the scheme: apply it on 4 fingers, dry in a lamp for a minute. Then treat your thumb, dry it separately. Further, all these manipulations are carried out with the second hand. Do not apply varnish to all fingers (including thumbs) at the same time, otherwise the coating will drain to one side.
STEP # 4
Let's start covering with color. The selected color is applied first in a thin layer, cured in a lamp for 45 seconds. Then the second layer is made, the drying time is 1 minute. Similar to the base, paint 4 nails first, then the platinum on the thumb. If the color is unevenly distributed, add a third layer.
STEP # 5
If decorations are used (rhinestones, stickers, etc.), it's time to attach them, since you won't be able to make gel polish with rhinestones or sliders after applying the finish. To attach the elements at home, take a toothpick, dip it in transparent varnish in stages and grab the decor element with the tip. Attach rhinestones one by one.
STEP # 6
Next, the finish (top) is applied in a fairly dense layer. Again, don't forget to seal the free edge by brushing over it. Now remove the sticky layer with a dehydrator (degreaser). Soak a lint-free napkin in it, wipe nail by nail. Finally, wet the cuticle with oil. Ready!
Possible problems when applying gel polish
We found out what is needed to apply gel polish, considered a step-by-step technique. But many masters are faced with the fragility of the result. Gel polish bubbles or falls off in a week, what should I do?

Problem # 1. Gel polish disappears in 2-3 days
Many craftsmen are faced with the fact that the coating falls off as a solid plate literally 2 days after application. The problem is this:
- you did not remove the cuticle, as a result of which it grew back and prevented the varnish from holding firmly;
- you did not remove the buffing of the nail polish, thereby reducing the duration of the manicure wear;
- you carried out a step-by-step application of gel polish on moistened nails;
- you used a poor quality primer or base;
- you have not sealed the free edge of the nail plates.
Before you make a gel polish to extend its wear life, review all the steps again. At home, everything can be done in stages, you do not need to skip individual points.
Problem # 2. Brittle nails appeared
If, after application, the marigolds become brittle, there are only 2 reasons for this:
- you did not buff the plates without preventing delamination at an early stage;
- you have overbuffed the surface of the nails so that they become thin.
The solution will be the following: in the process of removing the gloss, do not rub the nail too hard with the buff. It is enough to swipe the instrument over it 2-3 times for a slight dullness to appear.
Problem number 3. Gel polish voids, cracks
If you notice that the coating is deformed, empty spaces appear between it and the nail, or the varnish is covered with cracks, the reasons may be this:
- insufficient drying time in the lamp;
- the use of top-end coating of low quality;
- the varnish was applied in thick layers.
Solution: increase the drying time, apply layers very thinly (it is better to make a layer larger), use a high quality top, primer, base.
Today we looked at how to make a high-quality gel polish on your own at home. All equipment is planned in stages, so you shouldn't have any difficulties. Don't skip steps, get ready necessary tools and materials, learn and gain experience! Good luck!